# 自定义远程武器
# 1 概述
可蓄力物品如原版中的弓(minecraft:bow)、弩(minecraft:crossbow)一样,鼠标右键按下时进行蓄力,鼠标右键抬起发射武器。
自定义远程武器包括以下部分内容:
- 自定义物品
- 序列帧动画,可用做射击动画
- 右键蓄力后释放触发事件,可以在事件中发射自定义抛射物
- 手中渲染偏移配置
- 自定义抛射物
- 自定义贴图、模型、动画配置
- 抛射物掉落在地上时捡起物品
- 发射抛射物控制,包括发射力量、初始位置、方向、重力因子、造成伤害值等
- 方向性抛射物
本文档将结合示例CustomRangedWeaponMod进行说明如何定义一把远程武器。
# 2 自定义可蓄力物品
# 2.1 自定义物品
自定义可蓄力物品的identifier必须以:bow结尾,否则第三人称下的抬手动作不会生效。

# 2.1.1 json组件说明
minecraft:use_duration
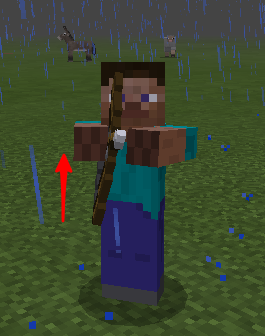
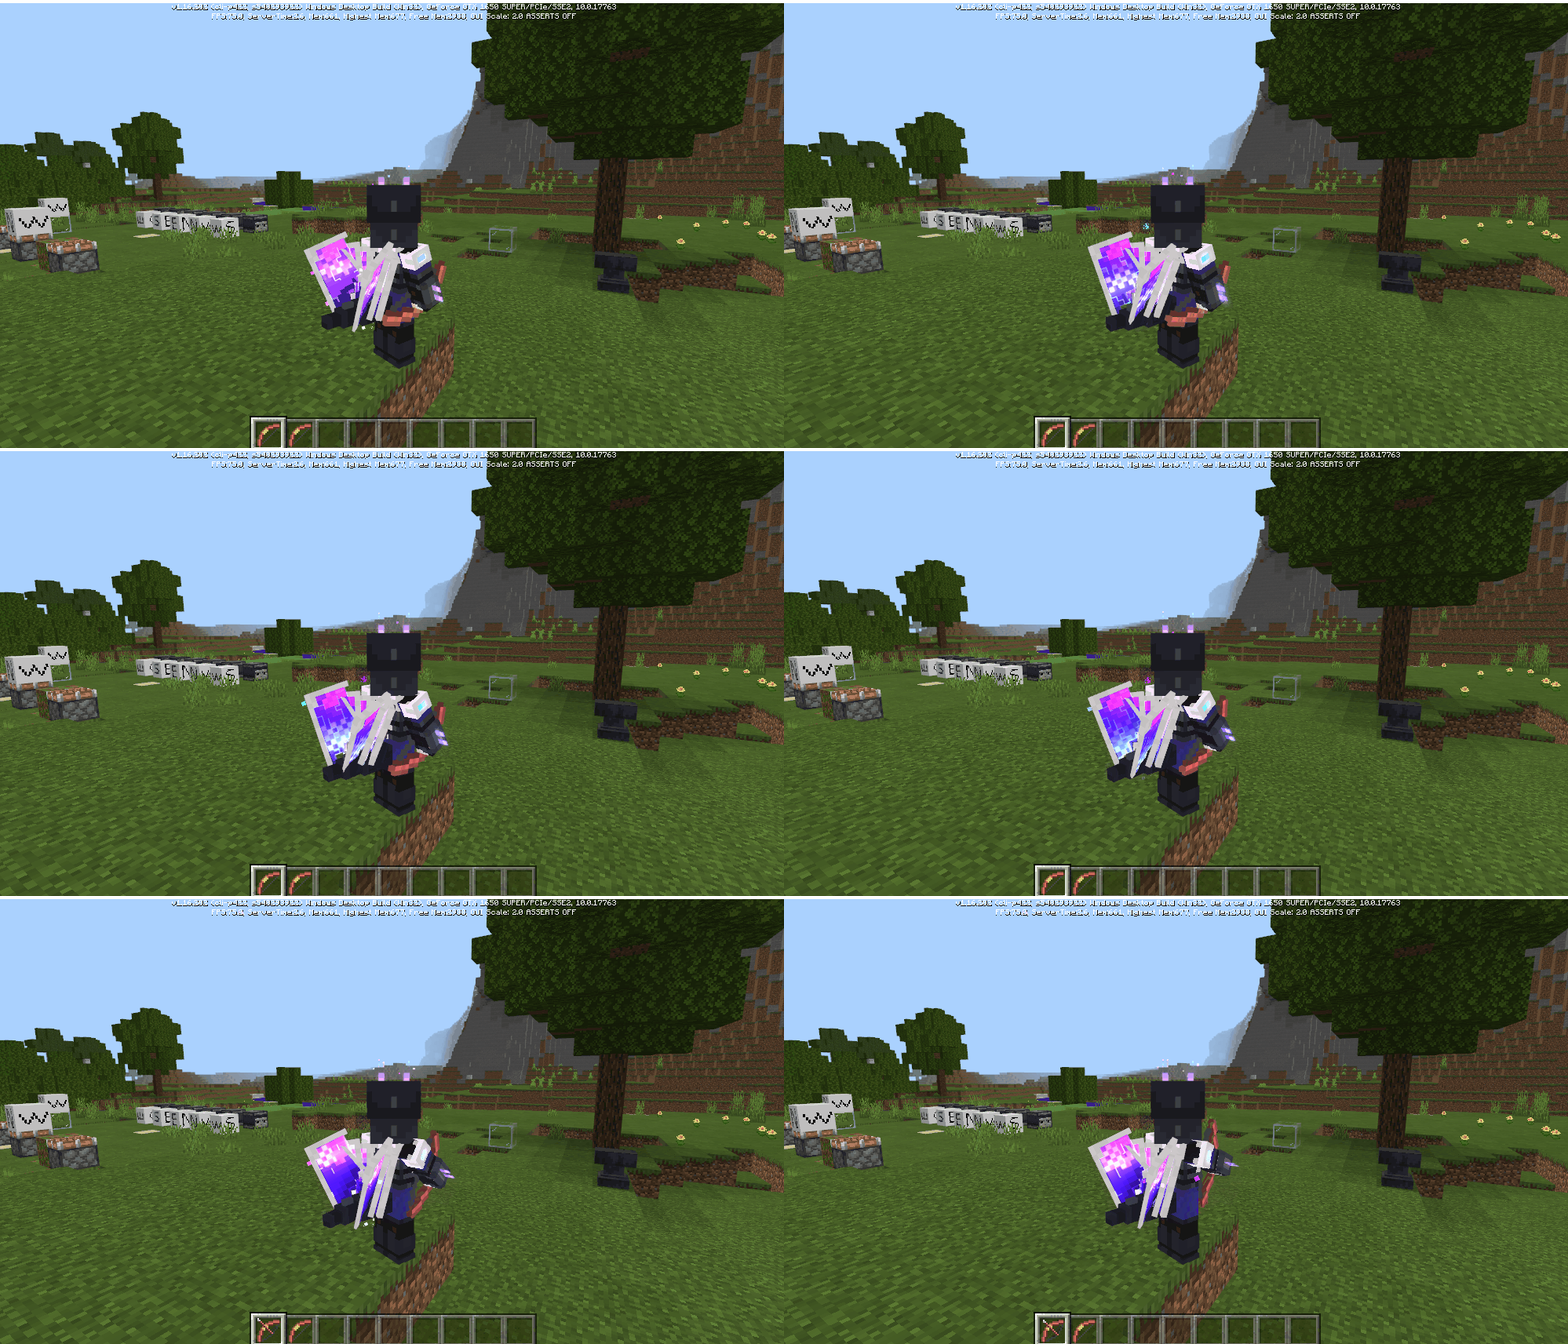
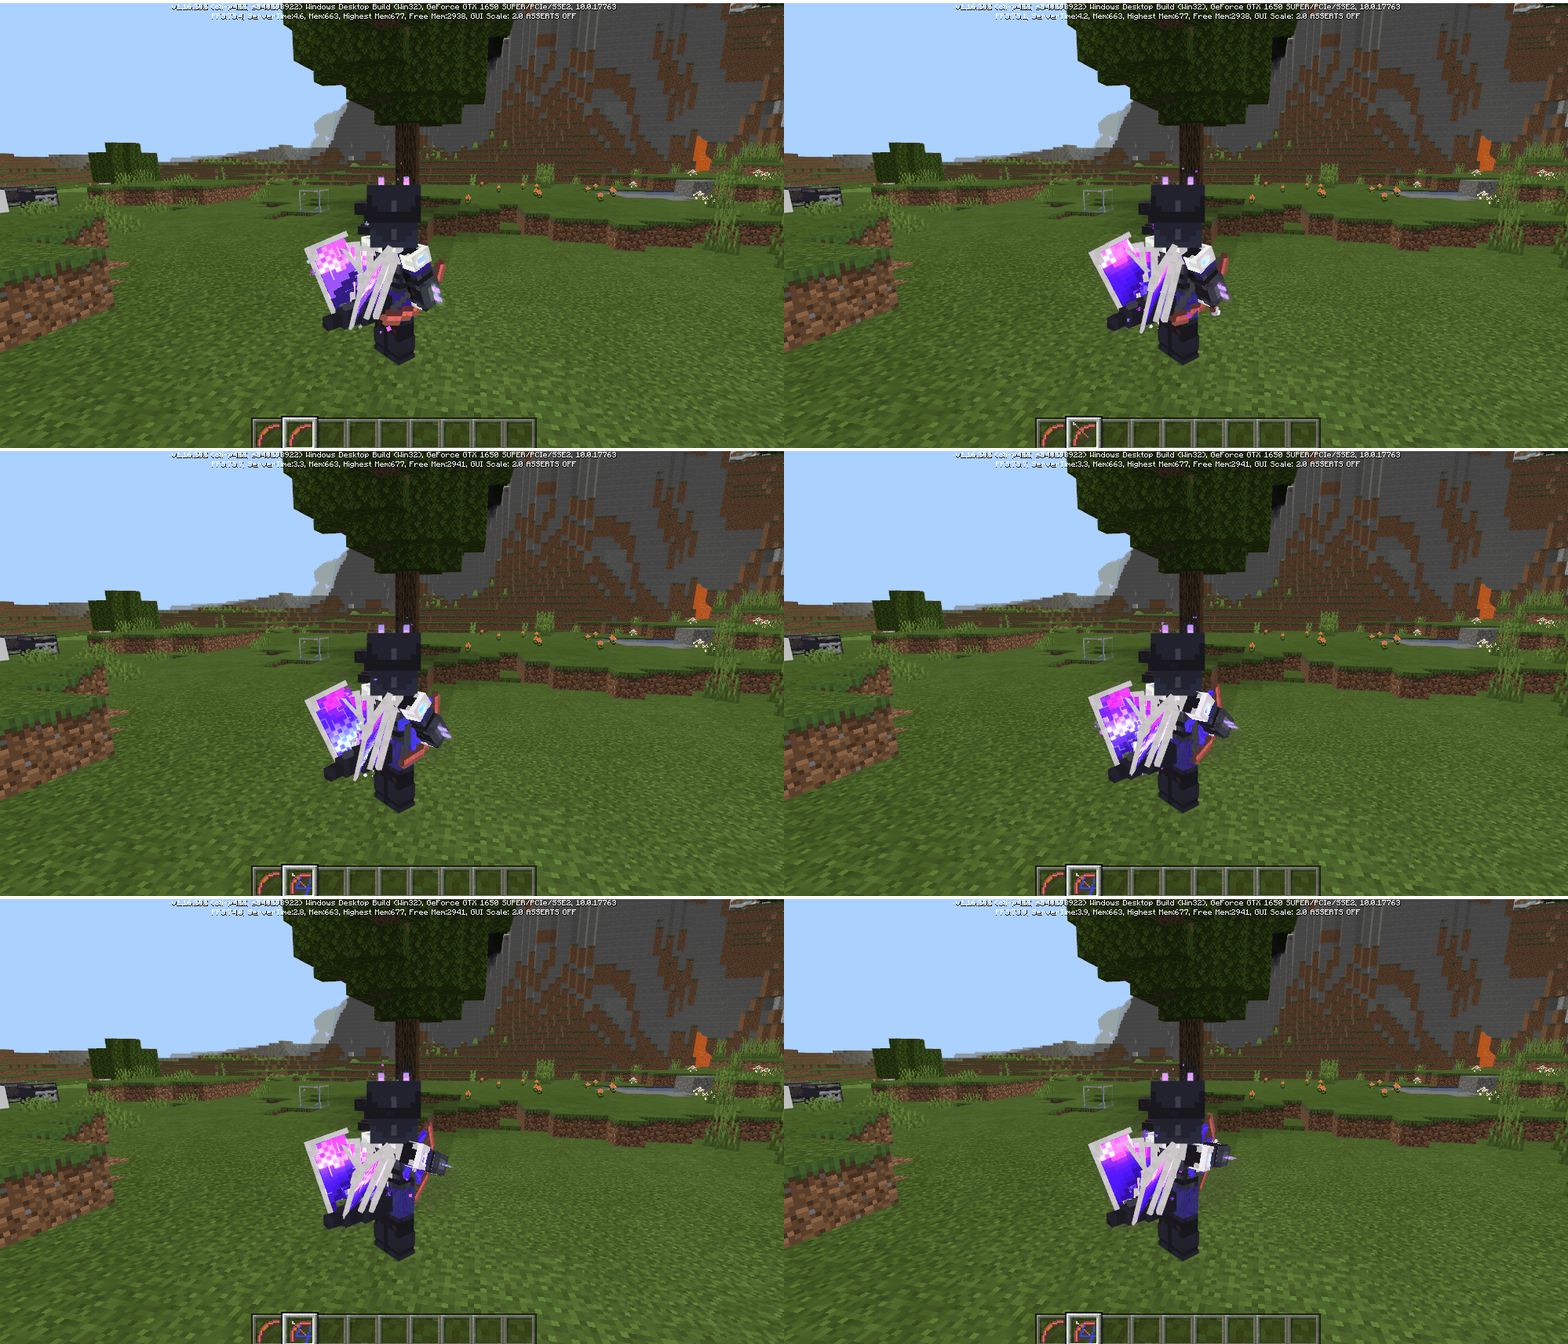
物品最大使用时长,也就是物品蓄力过程的最大时长,与第三人称下抬起手的速度有关,该值越大,抬手速度越慢。
下图分别展示use_duration为40和use_duration为100时的速度对比:
 ↑use_duration为40
 ↑use_duration为100
如果未配置
↑use_duration为100
如果未配置minecraft:use_duration将不会播放该动画,并且蓄力时间没有上限,ItemReleaseUsingClientEvent/ItemReleaseUsingServerEvent这两个事件返回的durationLeft为负数。netease:render_offsets
手中物品渲染参数
netease:frame_animation
物品使用过程动画序列帧
minecraft:use_animation
使用物品时播放的动画,需在材质包中定义,如原版使用
apple时会播放eat动画,在resource_packs/vanilla/items/apple.json中就有"minecraft:use_animation": "eat"配置。在自定义远程物品中,通常使用的是弓的动画,即
"minecraft:use_animation": "bow"。
# 2.1.2 行为包json配置
与《1-自定义基础物品》文档中的1.2注册部分一样,在behavior/netease_items_beh目录下增加物品json文件,如customrangedweapon_bow.json。
注意:description的custom_item_type字段标为ranged_weapon,同时identifier必须以:bow结尾(如:customrangedweapon:bow),否则第三视角下不会播放动画,如下示例:
{
  "format_version": "1.10",
  "minecraft:item": {
    "description": {
      "identifier": "customrangedweapon:bow", # 必须是:bow结尾
      "custom_item_type": "ranged_weapon" # 此类型表示自定义远程武器物品
    },

    "components": {
      "minecraft:use_duration": 72000, # 该值影响抬手动作的速度
      "netease:render_offsets": {
        "controller_position_adjust": [ 0.0, 0.1, 0.0 ],
        "controller_rotation_adjust": [ 0.0, -45.0, 0.0 ],
        "controller_scale": 1
      }
    }
  }
}
netease:render_offsets在下面自定义渲染偏移章节进行说明。
# 2.1.3 自定义蓄力动画帧
- 资源包json配置
在resource/netease_items_res下增加json文件,如customrangedweapon_bow.json
内容如下所示:
{
  "format_version": "1.10",
  "minecraft:item": {
    "description": {
      "identifier": "customrangedweapon:bow", # 该值必须以:bow结尾
      "category": "Equipment"
    },
    "components": {
      "minecraft:icon": "customrangedweapon:bow",
      "netease:frame_animation": {
        "frame_count": 3,
        "texture_name": "customrangedweapon:bow_frame",
        "animate_in_toolbar": true
      }
    }
  }
}
- json组件说明
netease:frame_animation
| 键 | 类型 | 默认值 | 解释 |
|---|---|---|---|
| frame_count | int | 1 | 蓄力过程帧动画帧数 |
| texture_name | str | 蓄力过程帧动画texture映射名 | |
| animate_in_toolbar | bool | false | 蓄力过程在物品栏是否也显示动画 |
- 动画序列帧
在resource/textures/items文件夹中增加三张贴图,分别是:
customitems_ranged_weapon_0.png
customitems_ranged_weapon_1.png
customitems_ranged_weapon_2.png
resource/textures/item_texture.json中如下所示:
"customrangedweapon:bow": {
    "textures": "textures/items/customitems_ranged_weapon_0"
},
"customrangedweapon:bow_frame": {
    "textures": [
        "textures/items/customitems_ranged_weapon_0",
        "textures/items/customitems_ranged_weapon_1",
        "textures/items/customitems_ranged_weapon_2"
    ]
}
其中,这三张贴图文件后缀0、1、2分别表示动画的帧数。
至此,我们已经定义好了一个支持帧动画的可蓄力物品。
# 2.1.4 自定义渲染偏移
另外,对于自定义可蓄力物品,我们增加了物品的偏移配置性。
netease:render_offsets
| 键 | 类型 | 默认值 | 解释 |
|---|---|---|---|
| controller_position_adjust | array | [0.0,0.0,0.0] | 物品位置调整 |
| controller_rotation_adjust | array | [0.0,0.0,0.0] | 物品旋转调整 |
| controller_scale | float | 1.0 | 物品大小调整 |
# 2.2 视野变化控制
在CustomRangedWeaponMod中,我们使用camera组件提供的接口实现了一个类似弓拉近镜头效果的demo,这里简要地进行说明。
def ListenEvent(self):
		self.ListenForEvent(conf.EngineNamespace, conf.EngineSystemName, 'OnScriptTickClient', self,
		                    self.OnScriptTickClient)
		self.ListenForEvent(conf.EngineNamespace, conf.EngineSystemName, 'ClientItemTryUseEvent', self,
		                    self.OnClientItemTryUseEvent)
		self.ListenForEvent(conf.EngineNamespace, conf.EngineSystemName, "RangedWeaponReleaseUsingClientEvent",
		                    self, self.OnRangedWeaponReleaseUsingClientEvent)

	def Init(self):
		self.cameraComp = self.CreateComponent(clientApi.GetLevelId(), "Minecraft", "camera")
		self.cameraComp.SetFov(self.initFov)

	def OnScriptTickClient(self):
		self.tickCnt += 1
		offset = self.tickCnt - self.startUsingTick
		if self.isUsingItem:
			self.cameraComp.SetFov(self.initFov - offset * 0.15)

	def OnRangedWeaponReleaseUsingClientEvent(self, args):
		self.isUsingItem = False
		if self.initFov:
			self.cameraComp.SetFov(self.initFov)

    def OnClientItemTryUseEvent(self, args):
		if args["itemName"] == "customrangedweapon:bow" or args["itemName"] == "customrangedweapon:cross_bow" or \
			args["itemName"] == "customrangedweapon:boa":
			# control camera
			self.isUsingItem = True
			self.startUsingTick = self.tickCnt
- 鼠标右键开始使用物品时标记正在使用物品isUsingItem,并且记录当前帧数startUsingTick
- 在OnScriptTickClient的回调事件中使用接口SetFov不断拉近镜头
- 在鼠标右键抬起释放事件RangedWeaponReleaseUsingClientEvent的回调中重置摄像机的fov
# 3 自定义抛射物
# 3.1 概述
场景中的自定义抛射物就是一种实体,其定义方式和自定义生物一样。
下面通过自定义箭来说明如何自定义一个抛射物。
# 3.2 自定义过程
- 在behavior/entities下添加entity定义,如示例中的custom_arrow.json
其中netease:custom_entity_type如下所示:
"netease:custom_entity_type": {
	"value": "projectile_entity"
},
- 自定义抛射物捡起的物品
"netease:pick_up": {
	"item_name": "customrangedweapon:projectile", # 捡起物品的id
	"favored_slot": 1 # 捡起物品放在物品栏的位置
}
在resource/entity下增加entity的表现定义,如示例中的custom_arrow.entity.json
这里将贴图、材质、几何、动画、渲染控制器关联在一起。
{
	"format_version": "1.10.0",
	"minecraft:client_entity": {
	  "description": {
		"identifier": "customrangedweapon:custom_arrow",
		"materials": {
		  "default": "arrow"
		},
		"textures": {
		  "default": "textures/entity/custom_arrows"
		},
		"geometry": {
		  "default": "geometry.custom_arrow"
		},
		"animations": {
		  "move": "animation.custom_arrow.move"
		},
		"scripts": {
		  "pre_animation": [
			"variable.shake = query.shake_time - query.frame_alpha;",
			"variable.shake_power = variable.shake > 0.0 ? -Math.sin(variable.shake * 200.0) * variable.shake : 0.0;"
		  ],
		  "animate": [
			"move"
		  ]
		},
		"render_controllers": [ "controller.render.custom_arrow" ]
	  }
	}
  }
贴图
在resource/textures/entity目录下增加custom_arrows.png作为自定义生物的贴图
几何形状
在resource/models/entity目录下增加custom_arrow.geo.json定义自定义生物的几何形状
动画组件
在resource/animations目录下增加custom_arrow.animation.json定义自定义生物的动画
其中,因为箭的模型具有方向性,因此需要调整一下旋转角度rotation,如下所示:
{
	"format_version" : "1.8.0",
	"animations" : {
		"animation.custom_arrow.move" : {
			"loop" : true,
			"bones" : {
				"body" : {
					"rotation" : [ "variable.shake_power - query.target_x_rotation", "-query.target_y_rotation", 0.0 ],
					"scale" : [ 0.7, 0.7, 0.9 ]
				}
			}
		}
	}
}
渲染控制器
在resource/render_controllers目录下增加custom_arrow.render_controllers.json定义自定义生物的渲染控制器
# 3.3 使用自定义抛射物
# 3.3.1 物品使用发射自定义抛射物
过程参考《自定义物品》文档,不同点包括如下两点:
1)custom_item_type为projectile_item
2)components下需要包括使用哪种抛射物(包括vallina或者自定义的抛射物)
{
  "format_version": "1.10",
  "minecraft:item": {
    "description": {
      "identifier": "customrangedweapon:projectile",
      "category": "Nature",
      "custom_item_type": "projectile_item" # 自定义抛射物物品标记
    },

    "components": {
      "minecraft:max_stack_size": 32,
      "minecraft:max_damage": 10,
        "netease:show_in_hand": {
        "value": false
      },
      "netease:projectile": "customrangedweapon:custom_arrow" # 右键使用何种抛射物
    }
  }
}
上述例子在右键使用物品customrangedweapon:projectile时发射自定义抛射物customrangedweapon:custom_arrow
# 3.3.2 python脚本直接发射自定义抛射物
python脚本层提供了创建抛射物(包括vallina或者自定义的抛射物)的接口CreateProjectileEntity,定义如下:
def CreateProjectileEntity(self, spawnerId, entityIdentifier, param):
详情请查看mod sdk文档,示例如下:
def ListenEvent(self):
	self.ListenForEvent(serverApi.GetEngineNamespace(), serverApi.GetEngineSystemName(),
		"ItemReleaseUsingServerEvent", self, self.OnItemReleaseUsingServerEvent)

	def OnItemReleaseUsingServerEvent(self, args):
		print 'ItemReleaseUsingServerEvent:', args
		playerId = args["playerId"]
		comp = serverApi.GetEngineCompFactory().CreateProjectile(levelId)
		projectileEntityId = comp.CreateProjectileEntity(playerId, "customrangedweapon:custom_arrow")
# 3.4 自定义抛射物方向
抛射物如果非圆形,它具有一定的方向性的话,需要通过animation把模型的方向进行调整,如示例CustomRangedWeaponMod中的自定义箭(custom_arrow)
{
	"format_version" : "1.8.0",
	"animations" : {
		"animation.custom_arrow.move" : {
			"loop" : true,
			"bones" : {
				"body" : {
					"rotation" : [ "variable.shake_power - query.target_x_rotation", "-query.target_y_rotation", 0.0 ],
					"scale" : [ 0.7, 0.7, 0.9 ]
				}
			}
		}
	}
}
其中variable.shake_power为json定义的变量,用来做箭碰撞后的抖动;
query.target_x_rotation为引擎内定义的变量,返回此时自定义箭在x方向的旋转角度;
query.target_y_rotation为引擎内定义的变量,返回此时自定义箭在y方向的旋转角度。
另外,如果抛射物具有变化方向的话,需要进行数学运算得出最终的旋转角度。
# 3.5 其他相关
# 3.5.1 相关事件
# ProjectileDoHitEffectEvent
# ProjectileCritHitEvent
# 3.5.2 骨骼模型设置
自定义抛射物支持设置骨骼模型,参考如下:
def changeModel(args):
	comp = clientApi.CreateComponent(args['id'], "Minecraft", "model")
	comp.SetModel("xuenv")
 网易大神
网易大神 扫码下载网易大神